One
way to enjoy wood crafts
without taking up a lot of valuable
household space, and busting your budget
is to take up relief woodcarving.
Woodcarving can be a bit messy, so a
designated work area is advisable But
this area need not be large. Indeed, a
small worktable in a garage, basement,
or utility area is about all that's
need. A minimum of tools are required for this
hobby. Two or three Xacto type knife handles,
an assortment of blades, some sandpaper,
wood sealer, graphite or white transfer
paper, and a pattern are all that's
needed to get started. Other materials
required are common household items,
such as scissors, cellophane tape, and
ball point pen. Later on you can add
paints, brushes, and other items needed
for more advanced carving projects. Relief wood carving is easy to learn you simply draw the picture
and trace on to your chosen piece of wood. The tools mentioned
are ideal for the beginner because they do not need to be
sharpened. Merely discard the blade when it gets dull and
replace with a new one. The two or three different types of
handles will hold all the cutting and carving blades you will
need blades
for a myriad of uses, including chisels,
knives, gouges, and routers.
There are six different basic cuts in
relief
wood carving
Using these cuts the hobbyist
methodically carves out the design.
Basswood is the wood of choice for the
beginner, as it carves very easily.
Later on, as techniques are improved,
harder woods can be worked.
Walnut Hollow Farm
has an excellent beginner's book -
Creative Woodcarving - which covers
tools, techniques, and patterns in
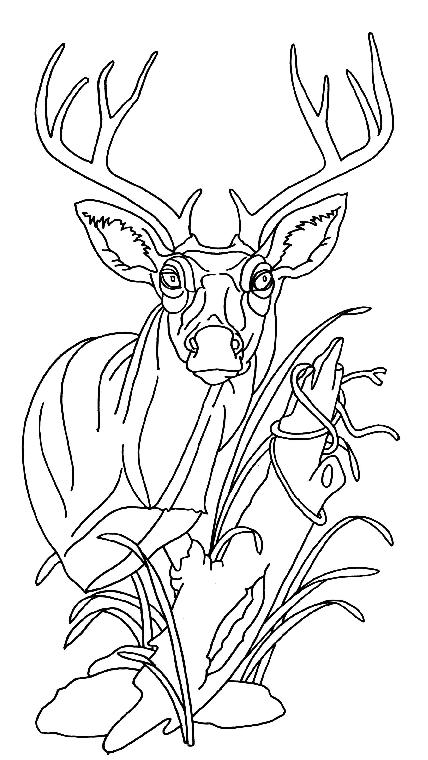
greater detail. Prepare the wood by sanding to a smooth
finish with a fine grade of sandpaper.
after sanding, the pattern is
transferred to the wood with graphite or
white transfer paper. Use graphite paper
for light woods, and white transfer
paper for dark woods. Tape the pattern
and transfer paper to the wood with
masking tape. Trace the pattern on the
wood with a fine point pen.
The working surface for carving should
be sturdy and at a comfortable height
for the carver. It is important that the
tools be sharp for all phases of the
carving project . If tools are dull, it
will cause the carver to try to force
the tool through the wood. Injury is
possible if the tool slips. Dull tools
also tear the wood, instead of cutting
it. By using Xacto tools, the hobbyist
can maintain sharp tools by merely
changing the blade.
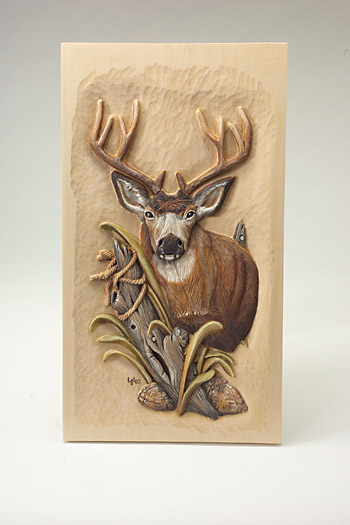
The hobbyist can create some really
beautiful projects by combining woodcarving and wood
burning. The pattern is first carved and
sanded. Replace the pattern and transfer
paper on the carving, and trace in the
details to be burned into the carving.
Highlight key features with the wood
burning pen, and apply a coat of wood
sealer to protect the design. The
hobbyist may also use paint or stain to
add a flair to the carving. add a flair to the carving.
Relief wood carving is a wonderful
hobby. And you don't need a large
expensive workshop to create some
fantastic works of art with a little
practice. This is a great craft for the
beginner! Making
Wooden Toys are wonderful gifts both for children
from one to ninety-nine. They have the
advantage of allowing a child's
imagination to roam and develop
naturally. How many times have you seen
a child ignore the expensive toy
and play with the box it came in?
Most can be made very inexpensively if
you have some basic carpentry skills and
the appropriate tools. You will need, a
drill with assorted sized bits, a
chisel, saw, hammer, screwdriver, nails,
screws, sandpaper, and along with some
small scraps of wood.
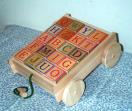
Simple Toy Making
Start with something simple like blocks.
You don't have to stick to the standard
square blocks, think of rectangles,
cylinders, pyramids and arches. Two
dozen blocks can create a fort, or a
castle a tower, or a space ship. As long
as the smallest blocks are too large to
fit in a toddlers mouth then the size is
immaterial. You should plan for all the
blocks to be interlocking. For example
the rectangles should be two, three or
even four of the square blocks long and
one or two blocks wide. When you have
cut the blocks, sand all the edges into
a slight curve, this will help eliminate
splinters and make injuries less likely.
If you use enamel paints the blocks will
have a fairly durable surface. Be sure
to use lead free paint in the primary
colours since these are the ones that
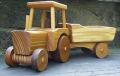
Cars, trucks tractors and wagons are not
difficult. You will probably want to add
wood glue to your list of supplies if
you are going to make some of these
types of toys for children. Find a good
picture of the vehicle you want to
create for your child and look at it in
terms of squares, rectangles, and
cylinders. A pick up truck, is a long
rectangle with a square at one end,
sitting on four short cylinders. You can
of course get more creative, and put
sides on the truck bed so that your
child can haul things in the back, but
you are still working with the same
basic shapes.
If you use two dowels for the axle going
through the body of the truck or car it
will be almost indestructible. For older
children you can use a chisel to create
the windows, and make markings for the
doors, and handles. When you assemble
the pieces you should glue and nail or
screw the pieces together for extra
strength. Remember to sand smooth and
round any edges that will be exposed.
Bright primary colours in lead free
enamel will finish the vehicle.
The
possibilities are endless only limited
by your time, patience and imagination.
Dollhouses for the 11 1/2-inch dolls
that are so popular now or how about a
wooden toy chest to keep all those
wonderful toys you have made? You could
even make some beads to string, by
simply drilling holes in small wooden
blocks that have had the edges rounded.
Babies like toys that move, so put
wheels on an lion, or giraffe.
or giraffe.
or giraffe.
Remember to always use lead free paint
and round all corners. If you decide to
add a pull string, make sure it is too
short to wrap around a child's neck and
where possible always use two methods of
attaching parts together. Your creations
should last for many years, and with a
little bit of touch up paint can be
passed on to future generations.
Arts and Crafts - Handmade hand painted watercolour greetings cards with a hand cut pattern edged internal page and your very own verse or message printed inside.ged internal page and your very own verse or message printed inside. Original Art and Crafts including watercolour paintings or choose from a selection of handmade woodcrafts,Antiques
and collectables.